Dell EMC VNX driver
EMC VNX driver interacts with configured VNX array. It supports both iSCSI and FC protocol.
The VNX cinder driver performs the volume operations by executing Navisphere CLI (NaviSecCLI) which is a command-line interface used for management, diagnostics, and reporting functions for VNX. It also supports both iSCSI and FC protocol.
System requirements
VNX Operational Environment for Block version 5.32 or higher.
VNX Snapshot and Thin Provisioning license should be activated for VNX.
Python library
storopsversion 0.5.7 or higher to interact with VNX.Navisphere CLI v7.32 or higher is installed along with the driver.
Supported operations
Create, delete, attach, and detach volumes.
Create, list, and delete volume snapshots.
Create a volume from a snapshot.
Copy an image to a volume.
Clone a volume.
Extend a volume.
Migrate a volume.
Retype a volume.
Get volume statistics.
Create and delete consistency groups.
Create, list, and delete consistency group snapshots.
Modify consistency groups.
Efficient non-disruptive volume backup.
Create a cloned consistency group.
Create a consistency group from consistency group snapshots.
Replication v2.1 support.
Generic Group support.
Revert a volume to a snapshot.
Preparation
This section contains instructions to prepare the Block Storage nodes to use the EMC VNX driver. You should install the Navisphere CLI and ensure you have correct zoning configurations.
Install Python library storops
storops is a Python library that interacts with VNX array through
Navisphere CLI.
Use the following command to install the storops library:
$ pip install storops
Check array software
Make sure your have the following software installed for certain features:
Feature |
Software Required |
|---|---|
All |
ThinProvisioning |
All |
VNXSnapshots |
FAST cache support |
FASTCache |
Create volume with type |
Compression |
Create volume with type |
Deduplication |
Required software
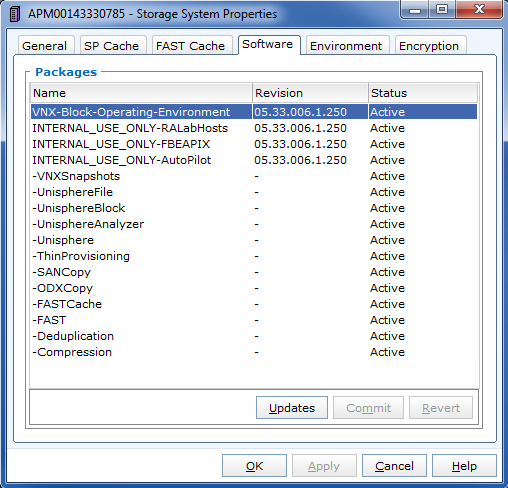
You can check the status of your array software in the Software page of Storage System Properties. Here is how it looks like:
Network configuration
For the FC Driver, FC zoning is properly configured between the hosts and the VNX. Check Register FC port with VNX for reference.
For the iSCSI Driver, make sure your VNX iSCSI port is accessible by your hosts. Check Register iSCSI port with VNX for reference.
You can use initiator_auto_registration = True configuration to avoid
registering the ports manually. Check the detail of the configuration in
Back-end configuration for reference.
If you are trying to setup multipath, refer to Multipath setup.
Back-end configuration
Make the following changes in the /etc/cinder/cinder.conf file.
Minimum configuration
Here is a sample of minimum back-end configuration. See the following sections
for the detail of each option.
Set storage_protocol = iscsi if iSCSI protocol is used.
[DEFAULT]
enabled_backends = vnx_array1

[vnx_array1]
san_ip = 10.10.72.41
san_login = sysadmin
san_password = sysadmin
naviseccli_path = /opt/Navisphere/bin/naviseccli
volume_driver = cinder.volume.drivers.dell_emc.vnx.driver.VNXDriver
initiator_auto_registration = True
storage_protocol = fc
Multiple back-end configuration
Here is a sample of a minimum back-end configuration. See following sections
for the detail of each option.
Set storage_protocol = iscsi if iSCSI protocol is used.
[DEFAULT]
enabled_backends = backendA, backendB

[backendA]
storage_vnx_pool_names = Pool_01_SAS, Pool_02_FLASH
san_ip = 10.10.72.41
storage_vnx_security_file_dir = /etc/secfile/array1
naviseccli_path = /opt/Navisphere/bin/naviseccli
volume_driver = cinder.volume.drivers.dell_emc.vnx.driver.VNXDriver
initiator_auto_registration = True
storage_protocol = fc

[backendB]
storage_vnx_pool_names = Pool_02_SAS
san_ip = 10.10.26.101
san_login = username
san_password = password
naviseccli_path = /opt/Navisphere/bin/naviseccli
volume_driver = cinder.volume.drivers.dell_emc.vnx.driver.VNXDriver
initiator_auto_registration = True
storage_protocol = fc
The value of the option storage_protocol can be either fc or iscsi,
which is case insensitive.
For more details on multiple back ends, see Configure multiple-storage back ends.
Required configurations
IP of the VNX Storage Processors
Specify SP A or SP B IP to connect:
san_ip = <IP of VNX Storage Processor>
VNX login credentials
There are two ways to specify the credentials.
Use plain text username and password.
Supply for plain username and password:
san_login = <VNX account with administrator role>
san_password = <password for VNX account>
storage_vnx_authentication_type = global
Valid values for
storage_vnx_authentication_typeare:global(default),local, andldap.Use Security file.
This approach avoids the plain text password in your cinder configuration file. Supply a security file as below:
storage_vnx_security_file_dir = <path to security file>
Check Unisphere CLI user guide or Authenticate by security file for how to create a security file.
Path to your Unisphere CLI
Specify the absolute path to your naviseccli:
naviseccli_path = /opt/Navisphere/bin/naviseccli
Driver’s storage protocol
For the FC Driver, add the following option:
volume_driver = cinder.volume.drivers.dell_emc.vnx.driver.VNXDriver
storage_protocol = fc
For iSCSI Driver, add the following option:
volume_driver = cinder.volume.drivers.dell_emc.vnx.driver.VNXDriver
storage_protocol = iscsi
Optional configurations
VNX pool names
Specify the list of pools to be managed, separated by commas. They should already exist in VNX.
storage_vnx_pool_names = pool 1, pool 2
If this value is not specified, all pools of the array will be used.
Initiator auto registration
When initiator_auto_registration is set to True, the driver will
automatically register initiators to all working target ports of the VNX array
during volume attaching (The driver will skip those initiators that have
already been registered) if the option io_port_list is not specified in
the cinder.conf file.
If the user wants to register the initiators with some specific ports but not register with the other ports, this functionality should be disabled.
When a comma-separated list is given to io_port_list, the driver will only
register the initiator to the ports specified in the list and only return
target port(s) which belong to the target ports in the io_port_list instead
of all target ports.
Example for FC ports:
io_port_list = a-1,B-3
aorBis Storage Processor, number1and3are Port ID.Example for iSCSI ports:
io_port_list = a-1-0,B-3-0
aorBis Storage Processor, the first numbers1and3are Port ID and the second number0is Virtual Port ID
Note
Rather than de-registered, the registered ports will be simply bypassed whatever they are in
io_port_listor not.The driver will raise an exception if ports in
io_port_listdo not exist in VNX during startup.
Force delete volumes in storage group
Some available volumes may remain in storage group on the VNX array due to
some OpenStack timeout issue. But the VNX array do not allow the user to delete
the volumes which are in storage group. Option
force_delete_lun_in_storagegroup is introduced to allow the user to delete
the available volumes in this tricky situation.
When force_delete_lun_in_storagegroup is set to True in the back-end
section, the driver will move the volumes out of the storage groups and then
delete them if the user tries to delete the volumes that remain in the storage
group on the VNX array.
The default value of force_delete_lun_in_storagegroup is True.
Over subscription in thin provisioning
Over subscription allows that the sum of all volume’s capacity (provisioned capacity) to be larger than the pool’s total capacity.
max_over_subscription_ratio in the back-end section is the ratio of
provisioned capacity over total capacity.
The default value of max_over_subscription_ratio is 20.0, which means
the provisioned capacity can be 20 times of the total capacity.
If the value of this ratio is set larger than 1.0, the provisioned
capacity can exceed the total capacity.
Storage group automatic deletion
For volume attaching, the driver has a storage group on VNX for each compute
node hosting the vm instances which are going to consume VNX Block Storage
(using compute node’s host name as storage group’s name). All the volumes
attached to the VM instances in a compute node will be put into the storage
group. If destroy_empty_storage_group is set to True, the driver will
remove the empty storage group after its last volume is detached. For data
safety, it does not suggest to set destroy_empty_storage_group=True unless
the VNX is exclusively managed by one Block Storage node because consistent
lock_path is required for operation synchronization for this behavior.
Initiator auto deregistration
Enabling storage group automatic deletion is the precondition of this function.
If initiator_auto_deregistration is set to True is set, the driver will
deregister all FC and iSCSI initiators of the host after its storage group is
deleted.
FC SAN auto zoning
The EMC VNX driver supports FC SAN auto zoning when ZoneManager is
configured and zoning_mode is set to fabric in cinder.conf.
For ZoneManager configuration, refer to Fibre Channel Zone Manager.
Volume number threshold
In VNX, there is a limitation on the number of pool volumes that can be created in the system. When the limitation is reached, no more pool volumes can be created even if there is remaining capacity in the storage pool. In other words, if the scheduler dispatches a volume creation request to a back end that has free capacity but reaches the volume limitation, the creation fails.
The default value of check_max_pool_luns_threshold is False. When
check_max_pool_luns_threshold=True, the pool-based back end will check the
limit and will report 0 free capacity to the scheduler if the limit is reached.
So the scheduler will be able to skip this kind of pool-based back end that
runs out of the pool volume number.
Note
From Queens, check_max_pool_luns_threshold is obsolete. And the behavior
is like where check_max_pool_luns_threshold is set to True.
iSCSI initiators
iscsi_initiators is a dictionary of IP addresses of the iSCSI
initiator ports on OpenStack compute and block storage nodes which want to
connect to VNX via iSCSI. If this option is configured, the driver will
leverage this information to find an accessible iSCSI target portal for the
initiator when attaching volume. Otherwise, the iSCSI target portal will be
chosen in a relative random way.
Note
This option is only valid for iSCSI driver.
Here is an example. VNX will connect host1 with 10.0.0.1 and
10.0.0.2. And it will connect host2 with 10.0.0.3.
The key name (host1 in the example) should be the output of
hostname command.
iscsi_initiators = {"host1":["10.0.0.1", "10.0.0.2"],"host2":["10.0.0.3"]}
Default timeout
Specify the timeout in minutes for operations like LUN migration, LUN creation, etc. For example, LUN migration is a typical long running operation, which depends on the LUN size and the load of the array. An upper bound in the specific deployment can be set to avoid unnecessary long wait.
The default value for this option is infinite.
default_timeout = 60
Max LUNs per storage group
The max_luns_per_storage_group specify the maximum number of LUNs in a
storage group. Default value is 255. It is also the maximum value supported by
VNX.
Ignore pool full threshold
If ignore_pool_full_threshold is set to True, driver will force LUN
creation even if the full threshold of pool is reached. Default to False.
Default value for async migration
Option vnx_async_migrate is used to set the default value of async
migration for the backend. The default value of this option is True if it
isn’t set in cinder.conf to preserve compatibility. If async_migrate is
not set in metadata of volume, the value of this option will be used.
Otherwise, async_migrate value in metadata will override the value of this
option. For more detail, refer to asynchronous migration support.
Extra spec options
Extra specs are used in volume types created in Block Storage as the preferred property of the volume.
The Block Storage scheduler will use extra specs to find the suitable back end for the volume and the Block Storage driver will create the volume based on the properties specified by the extra spec.
Use the following command to create a volume type:
$ openstack volume type create demoVolumeType
Use the following command to update the extra spec of a volume type:
$ openstack volume type set --property provisioning:type=thin --property thick_provisioning_support='<is> True' demoVolumeType
The following sections describe the VNX extra keys.
Provisioning type
Key:
provisioning:typePossible Values:
thickVolume is fully provisioned.
Run the following commands to create a
thickvolume type:$ openstack volume type create ThickVolumeType $ openstack volume type set --property provisioning:type=thick --property thick_provisioning_support='<is> True' ThickVolumeType
thinVolume is virtually provisioned.
Run the following commands to create a
thinvolume type:$ openstack volume type create ThinVolumeType $ openstack volume type set --property provisioning:type=thin --property thin_provisioning_support='<is> True' ThinVolumeType
deduplicatedVolume is
thinand deduplication is enabled. The administrator shall go to VNX to configure the system level deduplication settings. To create a deduplicated volume, the VNX Deduplication license must be activated on VNX, and specifydeduplication_support=Trueto let Block Storage scheduler find the proper volume back end.Run the following commands to create a
deduplicatedvolume type:$ openstack volume type create DeduplicatedVolumeType $ openstack volume type set --property provisioning:type=deduplicated --property deduplicated_support='<is> True' DeduplicatedVolumeType
compressedVolume is
thinand compression is enabled. The administrator shall go to the VNX to configure the system level compression settings. To create a compressed volume, the VNX Compression license must be activated on VNX, and usecompression_support=Trueto let Block Storage scheduler find a volume back end. VNX does not support creating snapshots on a compressed volume.Run the following commands to create a
compressedvolume type:$ openstack volume type create CompressedVolumeType $ openstack volume type set --property provisioning:type=compressed --property compression_support='<is> True' CompressedVolumeType
Default:
thick
Note
provisioning:type replaces the old spec key storagetype:provisioning.
The latter one is obsolete since the Mitaka release.
Storage tiering support
Key:
storagetype:tieringPossible values:
StartHighThenAutoAutoHighestAvailableLowestAvailableNoMovement
Default:
StartHighThenAuto
VNX supports fully automated storage tiering which requires the FAST license
activated on the VNX. The OpenStack administrator can use the extra spec key
storagetype:tiering to set the tiering policy of a volume and use the key
fast_support='<is> True' to let Block Storage scheduler find a volume back
end which manages a VNX with FAST license activated. Here are the five
supported values for the extra spec key storagetype:tiering:
Run the following commands to create a volume type with tiering policy:
$ openstack volume type create ThinVolumeOnAutoTier
$ openstack volume type set --property provisioning:type=thin --property storagetype:tiering=Auto --property fast_support='<is> True' ThinVolumeOnAutoTier
Note
The tiering policy cannot be applied to a deduplicated volume. Tiering policy of the deduplicated LUN align with the settings of the pool.
FAST cache support
Key:
fast_cache_enabledPossible values:
TrueFalse
Default:
False
VNX has FAST Cache feature which requires the FAST Cache license activated on
the VNX. Volume will be created on the backend with FAST cache enabled when
<is> True is specified.
Pool name
Key:
pool_namePossible values: name of the storage pool managed by cinder
Default: None
If the user wants to create a volume on a certain storage pool in a back end that manages multiple pools, a volume type with a extra spec specified storage pool should be created first, then the user can use this volume type to create the volume.
Run the following commands to create the volume type:
$ openstack volume type create HighPerf
$ openstack volume type set --property pool_name=Pool_02_SASFLASH --property volume_backend_name=vnx_41 HighPerf
Obsolete extra specs
Note
DO NOT use the following obsolete extra spec keys:
storagetype:provisioningstoragetype:pool
Force detach
The user could use os-force_detach action to detach a volume from all its attached hosts. For more detail, please refer to https://docs.openstack.org/api-ref/block-storage/v3/?expanded=force-detach-a-volume-detail#force-detach-a-volume
Advanced features
Snap copy
Metadata Key:
snapcopyPossible Values:
TrueortrueFalseorfalse
Default: False
VNX driver supports snap copy which accelerates the process for creating a copied volume.
By default, the driver will use asynchronous migration support, which will start a VNX migration session. When snap copy is used, driver creates a snapshot and mounts it as a volume for the 2 kinds of operations which will be instant even for large volumes.
To enable this functionality, append --metadata snapcopy=True
when creating cloned volume or creating volume from snapshot.
$ cinder create --source-volid <source-void> --name "cloned_volume" --metadata snapcopy=True
Or
$ cinder create --snapshot-id <snapshot-id> --name "vol_from_snapshot" --metadata snapcopy=True
The newly created volume is a snap copy instead of a full copy. If a full copy is needed, retype or migrate can be used to convert the snap-copy volume to a full-copy volume which may be time-consuming.
You can determine whether the volume is a snap-copy volume or not by
showing its metadata. If the snapcopy in metadata is True or true,
the volume is a snap-copy volume. Otherwise, it is a full-copy volume.
$ cinder metadata-show <volume>
Constraints
The number of snap-copy volumes created from a single source volume is limited to 255 at one point in time.
The source volume which has snap-copy volume can not be deleted or migrated.
snapcopy volume will be change to full-copy volume after host-assisted or storage-assisted migration.
snapcopy volume can not be added to consisgroup because of VNX limitation.
Efficient non-disruptive volume backup
The default implementation in Block Storage for non-disruptive volume backup is not efficient since a cloned volume will be created during backup.
The approach of efficient backup is to create a snapshot for the volume and connect this snapshot (a mount point in VNX) to the Block Storage host for volume backup. This eliminates migration time involved in volume clone.
Constraints
Backup creation for a snap-copy volume is not allowed if the volume status is
in-usesince snapshot cannot be taken from this volume.
Configurable migration rate
VNX cinder driver is leveraging the LUN migration from the VNX. LUN migration
is involved in cloning, migrating, retyping, and creating volume from snapshot.
When admin set migrate_rate in volume’s metadata, VNX driver can start
migration with specified rate. The available values for the migrate_rate
are high, asap, low and medium.
The following is an example to set migrate_rate to asap:
$ cinder metadata <volume-id> set migrate_rate=asap
After set, any cinder volume operations involving VNX LUN migration will take the value as the migration rate. To restore the migration rate to default, unset the metadata as following:
$ cinder metadata <volume-id> unset migrate_rate
Note
Do not use the asap migration rate when the system is in production, as the normal
host I/O may be interrupted. Use asap only when the system is offline
(free of any host-level I/O).
Replication v2.1 support
Cinder introduces Replication v2.1 support in Mitaka, it supports fail-over and fail-back replication for specific back end. In VNX cinder driver, MirrorView is used to set up replication for the volume.
To enable this feature, you need to set configuration in cinder.conf as
below:
replication_device = backend_id:<secondary VNX serial number>,
                     san_ip:192.168.1.2,
                     san_login:admin,
                     san_password:admin,
                     naviseccli_path:/opt/Navisphere/bin/naviseccli,
                     storage_vnx_authentication_type:global,
                     storage_vnx_security_file_dir:
Currently, only synchronized mode MirrorView is supported, and one volume
can only have 1 secondary storage system. Therefore, you can have only one
replication_device presented in driver configuration section.
To create a replication enabled volume, you need to create a volume type:
$ openstack volume type create replication-type
$ openstack volume type set --property replication_enabled="<is> True" replication-type
And then create volume with above volume type:
$ openstack volume create replication-volume --type replication-type --size 1
Supported operations
Create volume
Create cloned volume
Create volume from snapshot
Fail-over volume:
$ cinder failover-host --backend_id <secondary VNX serial number> <hostname>Fail-back volume:
$ cinder failover-host --backend_id default <hostname>
Requirements
2 VNX systems must be in same domain.
For iSCSI MirrorView, user needs to setup iSCSI connection before enable replication in Cinder.
For FC MirrorView, user needs to zone specific FC ports from 2 VNX system together.
MirrorView Sync enabler( MirrorView/S ) installed on both systems.
Write intent log enabled on both VNX systems.
For more information on how to configure, please refer to: MirrorView-Knowledgebook:-Releases-30-–-33
Asynchronous migration support
VNX Cinder driver now supports asynchronous migration during volume cloning.
The driver now using asynchronous migration when creating a volume from source as the default cloning method. The driver will return immediately after the migration session starts on the VNX, which dramatically reduces the time before a volume is available for use.
To disable this feature, user needs to do any one of below actions:
Configure
vnx_async_migrate = Falsefor the backend incinder.conf, then restart Cinder services.Add
--metadata async_migrate=Falsewhen creating new volume from source.
Be aware, async_migrate in metadata overrides the option
vnx_async_migrate when both are set.
Constraints
Before the migration finishes, snapshots cannot be created from the source volume, which could affect subsequent clones from the same source volume. The typical affected use case is that creating volume-2 via cloning volume-1 immediately after creating volume-1 via cloning volume-0. To achieve so, users are advised to take any one of below actions:
wait for the first clone finishing, or
create volume-2 via cloning volume-0 instead of volume-1, or
create volume-1 with
--metadata async_migrate=False.
Best practice
Multipath setup
Enabling multipath volume access is recommended for robust data access. The major configuration includes:
Install
multipath-tools,sysfsutilsandsg3-utilson the nodes hosting compute andcinder-volumeservices. Check the operating system manual for the system distribution for specific installation steps. For Red Hat based distributions, they should bedevice-mapper-multipath,sysfsutilsandsg3_utils.Specify
use_multipath_for_image_xfer=truein thecinder.conffile for each FC/iSCSI back end.Specify
volume_use_multipath=Trueinlibvirtsection of thenova.conffile. This option is valid for both iSCSI and FC driver. In versions prior to Newton, the option was callediscsi_use_multipath.
For multipath-tools, here is an EMC recommended sample of
/etc/multipath.conf file.
user_friendly_names is not specified in the configuration and thus
it will take the default value no. It is not recommended to set it
to yes because it may fail operations such as VM live migration.
blacklist {
    # Skip the files under /dev that are definitely not FC/iSCSI devices
    # Different system may need different customization
    devnode "^(ram|raw|loop|fd|md|dm-|sr|scd|st)[0-9]*"
    devnode "^hd[a-z][0-9]*"
    devnode "^cciss!c[0-9]d[0-9]*[p[0-9]*]"

    # Skip LUNZ device from VNX
    device {
        vendor "DGC"
        product "LUNZ"
        }
}

defaults {
    user_friendly_names no
    flush_on_last_del yes
}

devices {
    # Device attributed for EMC CLARiiON and VNX series ALUA
    device {
        vendor "DGC"
        product ".*"
        product_blacklist "LUNZ"
        path_grouping_policy group_by_prio
        path_selector "round-robin 0"
        path_checker emc_clariion
        features "1 queue_if_no_path"
        hardware_handler "1 alua"
        prio alua
        failback immediate
    }
}
Note
When multipath is used in OpenStack, multipath faulty devices may come out in Nova-Compute nodes due to different issues (Bug 1336683 is a typical example).
A solution to completely avoid faulty devices has not been found yet.
faulty_device_cleanup.py mitigates this issue when VNX iSCSI storage is
used. Cloud administrators can deploy the script in all Nova-Compute nodes and
use a CRON job to run the script on each Nova-Compute node periodically so that
faulty devices will not stay too long. Refer to: VNX faulty device
cleanup for
detailed usage and the script.
Restrictions and limitations
iSCSI port cache
EMC VNX iSCSI driver caches the iSCSI ports information, so that the user
should restart the cinder-volume service or wait for seconds (which is
configured by periodic_interval in the cinder.conf file) before any
volume attachment operation after changing the iSCSI port configurations.
Otherwise the attachment may fail because the old iSCSI port configurations
were used.
No extending for volume with snapshots
VNX does not support extending the thick volume which has a snapshot. If the
user tries to extend a volume which has a snapshot, the status of the volume
would change to error_extending.
Limitations for deploying cinder on computer node
It is not recommended to deploy the driver on a compute node if cinder
upload-to-image --force True is used against an in-use volume. Otherwise,
cinder upload-to-image --force True will terminate the data access of the
vm instance to the volume.
Storage group with host names in VNX
When the driver notices that there is no existing storage group that has the host name as the storage group name, it will create the storage group and also add the compute node’s or Block Storage node’s registered initiators into the storage group.
If the driver notices that the storage group already exists, it will assume that the registered initiators have also been put into it and skip the operations above for better performance.
It is recommended that the storage administrator does not create the storage group manually and instead relies on the driver for the preparation. If the storage administrator needs to create the storage group manually for some special requirements, the correct registered initiators should be put into the storage group as well (otherwise the following volume attaching operations will fail).
EMC storage-assisted volume migration
EMC VNX driver supports storage-assisted volume migration, when the user starts
migrating with cinder migrate --force-host-copy False <volume_id> <host> or
cinder migrate <volume_id> <host>, cinder will try to leverage the VNX’s
native volume migration functionality.
In following scenarios, VNX storage-assisted volume migration will not be triggered:
in-usevolume migration between back ends with different storage protocol, for example, FC and iSCSI.Volume is to be migrated across arrays.
Appendix
Authenticate by security file
VNX credentials are necessary when the driver connects to the VNX system.
Credentials in global, local and ldap scopes are supported. There
are two approaches to provide the credentials.
The recommended one is using the Navisphere CLI security file to provide the credentials which can get rid of providing the plain text credentials in the configuration file. Following is the instruction on how to do this.
Find out the Linux user id of the
cinder-volumeprocesses. Assuming thecinder-volumeservice is running by the accountcinder.Run
suas root user.In
/etc/passwdfile, changecinder:x:113:120::/var/lib/cinder:/bin/falsetocinder:x:113:120::/var/lib/cinder:/bin/bash(This temporary change is to make step 4 work.)Save the credentials on behalf of
cinderuser to a security file (assuming the array credentials areadmin/admininglobalscope). In the command below, the-secfilepathswitch is used to specify the location to save the security file.# su -l cinder -c \ '/opt/Navisphere/bin/naviseccli -AddUserSecurity -user admin -password admin -scope 0 -secfilepath <location>'
Change
cinder:x:113:120::/var/lib/cinder:/bin/bashback tocinder:x:113:120::/var/lib/cinder:/bin/falsein/etc/passwdfile.Remove the credentials options
san_login,san_passwordandstorage_vnx_authentication_typefromcinder.conffile. (normally it is/etc/cinder/cinder.conffile). Add optionstorage_vnx_security_file_dirand set its value to the directory path of your security file generated in the above step. Omit this option if-secfilepathis not used in the above step.Restart the
cinder-volumeservice to validate the change.
Register FC port with VNX
This configuration is only required when initiator_auto_registration=False.
To access VNX storage, the Compute nodes should be registered on VNX first if initiator auto registration is not enabled.
To perform Copy Image to Volume and Copy Volume to Image operations,
the nodes running the cinder-volume service (Block Storage nodes) must be
registered with the VNX as well.
The steps mentioned below are for the compute nodes. Follow the same steps for the Block Storage nodes also (The steps can be skipped if initiator auto registration is enabled).
Assume
20:00:00:24:FF:48:BA:C2:21:00:00:24:FF:48:BA:C2is the WWN of a FC initiator port name of the compute node whose host name and IP aremyhost1and10.10.61.1. Register20:00:00:24:FF:48:BA:C2:21:00:00:24:FF:48:BA:C2in Unisphere:Log in to Unisphere, go to .
Refresh and wait until the initiator
20:00:00:24:FF:48:BA:C2:21:00:00:24:FF:48:BA:C2with SP PortA-1appears.Click the Register button, select CLARiiON/VNX and enter the host name (which is the output of the hostname command) and IP address:
Hostname:
myhost1IP:
10.10.61.1Click Register.
Then host
10.10.61.1will appear under as well.Register the
wwnwith more ports if needed.
Register iSCSI port with VNX
This configuration is only required when initiator_auto_registration=False.
To access VNX storage, the compute nodes should be registered on VNX first if initiator auto registration is not enabled.
To perform Copy Image to Volume and Copy Volume to Image operations,
the nodes running the cinder-volume service (Block Storage nodes) must be
registered with the VNX as well.
The steps mentioned below are for the compute nodes. Follow the same steps for the Block Storage nodes also (The steps can be skipped if initiator auto registration is enabled).
On the compute node with IP address
10.10.61.1and host namemyhost1, execute the following commands (assuming10.10.61.35is the iSCSI target):Start the iSCSI initiator service on the node:
# /etc/init.d/open-iscsi startDiscover the iSCSI target portals on VNX:
# iscsiadm -m discovery -t st -p 10.10.61.35
Change directory to
/etc/iscsi:# cd /etc/iscsi
Find out the
iqnof the node:# more initiatorname.iscsi
Log in to VNX from the compute node using the target corresponding to the SPA port:
# iscsiadm -m node -T iqn.1992-04.com.emc:cx.apm01234567890.a0 -p 10.10.61.35 -l
Assume
iqn.1993-08.org.debian:01:1a2b3c4d5f6gis the initiator name of the compute node. Registeriqn.1993-08.org.debian:01:1a2b3c4d5f6gin Unisphere:Log in to Unisphere, go to .
Refresh and wait until the initiator
iqn.1993-08.org.debian:01:1a2b3c4d5f6gwith SP PortA-8v0appears.Click the Register button, select CLARiiON/VNX and enter the host name (which is the output of the hostname command) and IP address:
Hostname:
myhost1IP:
10.10.61.1Click Register.
Then host
10.10.61.1will appear under as well.
Log out iSCSI on the node:
# iscsiadm -m node -uLog in to VNX from the compute node using the target corresponding to the SPB port:
# iscsiadm -m node -T iqn.1992-04.com.emc:cx.apm01234567890.b8 -p 10.10.61.36 -l
In
Unisphere, register the initiator with the SPB port.Log out iSCSI on the node:
# iscsiadm -m node -uRegister the
iqnwith more ports if needed.
